
这篇文章介绍了如何修改Hexo-Butterfly主题,包括各种常见的修改以及对源码的改动。文章详细说明了代码修改位置、具体代码更改及配置文件的设置,帮助用户个性化定制博客主题
实现界面的完全自定义
只需要将Front-matter中的tape属性删除即可
以分类界面为例:
只需要将type: categories删除即可
---
title: 分类
date: 2020-05-20 09:34:30
---
跳过渲染,添加独立界面
此操作适合所有Hexo主题,可直接让Hexo框不渲染你的界面,实现完全独立的自定义界面
直接在hexo根路径的_config.yml中配置
skip_render:
  - 'ahzoo.html'
  - 'ahzoo2.html'
  - 'ahzoo3.html'
该配置支持正则表达式:
skip_render: '*.html'
跳过文件夹:
跳过该文件夹下所有文件:
skip_render:
  - 'ahzoo/*'
  - 'ahzoo2/*'
  - 'ahzoo3/*'
跳过该文件夹下包括子文件夹在内所有文件
skip_render:
  - 'ahzoo/**'
  - 'ahzoo2/**'
  - 'ahzoo3/**'
配置好跳过渲染的规则后,可直接将文件放至source文件夹下
随机背景图
\Butterfly\layout\includes\layout.pug
找到代码:
if theme.background
  - var is_photo = theme.background.substring(3,0) === 'url' ? 'photo':'color'
修改:
if theme.background
  - var is_photo = 'photo'
找到代码:
footer#footer(style=footer_bg data-type=is_bg)
  !=partial('includes/footer', {}, {cache:theme.fragment_cache})
在其下方增加代码后:
footer#footer(style=footer_bg data-type=is_bg)
  !=partial('includes/footer', {}, {cache:theme.fragment_cache})
#if !is_post()
  script() var bg_index = Math.floor(Math.random() * #{theme.background_num});var res = 'background-image: url("/img/banner/' + bg_index + '.jpg"); background-attachment: fixed;';document.getElementById('web_bg').style = res
if !is_post()表示文章页面不采用随机背景
修改完毕后在配置文件中将background设置为任意颜色,并添加代码:
# 随机背景图banner的数量
background_num: 16
页脚修改
添加跳动的心
首先在博客引入这个开源css
\themes\butterfly\layout\includes\footer.pug,找到此段代码:
    if theme.footer.owner.since && theme.footer.owner.since != nowYear
      .copyright!= `©${theme.footer.owner.since} - ${nowYear} By ${config.author}`
    else
      .copyright!= `©${nowYear} By ${config.author}`
修改为
    if theme.footer.owner.since && theme.footer.owner.since != nowYear
      .copyright!= `©${theme.footer.owner.since} - ${nowYear} <i style="color:#FF6A6A" class="fa fa-heartbeat"></i> ${config.author}`
    else
      .copyright!= `©${nowYear} <i style="color:#FF6A6A;animation: announ_animation 0.8s linear infinite;" class="fa fa-heartbeat"></i> ${config.author}`
Copyright版权美化
主题文档\layout\includes\post\post-copyright.pug
将原文档:
if theme.post_copyright.enable && page.copyright !== false
  - let author = page.copyright_author ? page.copyright_author : config.author
  - let authorHref = page.copyright_author_href ? page.copyright_author_href : `mailto:${config.email}`
  - let url = page.copyright_url ? page.copyright_url : page.permalink
  - let info = page.copyright_info ? page.copyright_info : _p('post.copyright.copyright_content', theme.post_copyright.license_url, theme.post_copyright.license, config.url, config.title)
  .post-copyright
    .post-copyright__author
      span.post-copyright-meta= _p('post.copyright.author') + ": "
      span.post-copyright-info
        a(href=authorHref)=author
    .post-copyright__type
      span.post-copyright-meta= _p('post.copyright.link') + ": "
      span.post-copyright-info
        a(href=url_for(url))= theme.post_copyright.decode ? decodeURI(url) : url
    .post-copyright__notice
      span.post-copyright-meta= _p('post.copyright.copyright_notice') + ": "
      span.post-copyright-info!= info
全部删除后修改为:
if theme.post_copyright.enable && page.copyright !== false
  - let author = page.copyright_author ? page.copyright_author : config.author
  - let url = page.copyright_url ? page.copyright_url : page.permalink
  - let license = page.license ? page.license : theme.post_copyright.license
  - let license_url = page.license_url ? page.license_url : theme.post_copyright.license_url
  .post-copyright
    .post-copyright__title
      span.post-copyright-info
        h #[=page.title]
    .post-copyright__type
      span.post-copyright-info
        a(href=url_for(url))= theme.post_copyright.decode ? decodeURI(url) : url
    .post-copyright-m
      .post-copyright-m-info
        .post-copyright-a
            h 作者
            .post-copyright-cc-info
                h=author
        .post-copyright-c
            h 发布于
            .post-copyright-cc-info
                h=date(page.date, config.date_format)
        .post-copyright-u
            h 更新于
            .post-copyright-cc-info
                h=date(page.updated, config.date_format)
        .post-copyright-c
            h 许可协议
            .post-copyright-cc-info
                a.icon(rel='noopener' target='_blank' title='Creative Commons' href='https://creativecommons.org/')
                  i.fab.fa-creative-commons
                a(rel='noopener' target='_blank' title=license href=url_for(license_url))=license
主题文档\source\css\_layout\post.styl
# 228行左右
.post-copyright
    position: relative
    margin: 2rem 0 .5rem
    padding: .5rem .8rem
    border: 1px solid var(--light-grey)
    transition: box-shadow .3s ease-in-out
+   overflow: hidden
+   border-radius: 12px!important
+   background-color: rgb(239 241 243)

238行左右
    &:before
-     @extend .fontawesomeIcon
-     position: absolute
-     top: .1rem
-     right: .6rem
-     color: $theme-color
-     content: '\f1f9'
-     font-size: 1rem
+     position: absolute
+     right: -26px
+     top: -120px
+     content: '\f25e'
+     font-size: 200px
+     font-family: 'Font Awesome 5 Brands'
+     opacity: .2


    &:hover
      box-shadow: 0 0 8px 0 rgba(232, 237, 250, .6), 0 2px 4px 0 rgba(232, 237, 250, .5)

    .post-copyright
      &-meta
        color: $light-blue
        font-weight: bold

      &-info
        padding-left: .3rem
258行左右
        a
-         text-decoration: underline
+         text-decoration: none
          word-break: break-word

          &:hover
            text-decoration: none

+ .post-copyright-cc-info
+   color: $theme-color;

268行左右
  .post-outdate-notice
    position: relative
    margin: 0 0 1rem
    padding: .5em 1.2em
-   border-radius: 3px
+   border-radius: 15px
    background-color: $noticeOutdate-bg
    color: $noticeOutdate-color
并在底部添加如下代码:
  .ads-wrap
    margin: 2rem 0
.post-copyright-m-info
  .post-copyright-a,
  .post-copyright-c,
  .post-copyright-u
    display inline-block
    width fit-content
    padding 2px 5px
[data-theme="dark"]
  #post
    .post-copyright
      background-color #07080a
      text-shadow #bfbeb8 0 0 2px
      border 1px solid rgb(19 18 18 / 35%)
      box-shadow 0 0 5px rgb(20, 120, 210)
      animation flashlight 1s linear infinite alternate
  .post-copyright-info
    color #e0e0e4

#post
  .post-copyright__title
    font-size 22px
  .post-copyright__notice
    font-size 15px

@keyframes flashlight
  from
    box-shadow 0 0 5px rgb(20, 120, 210)
  to
    box-shadow 0 0 2px rgb(20, 120, 210)
- 拓展功能(在文档front-matter处添加):
copyright_author:  自定义作者
copyright_url: 自定义原文链接
license: 自定义许可协议名称
license_url: 自定义许可协议链接

合并CSS文件
将自定义CSS并入主体CSS中,用以节省请求次数,以此加快访问速度
但是如果是单页CSS就没必要了,反而会拖慢加载速度主题文档\source\css\index.styl
@import '引入CSS文件的地址(网络或本地地址均可,相对路径为与css的相对路径)'
如果要合并整个文件夹的话也无需一个个添加,主题文档\source\css\下新建文件夹,文件夹名随意
然后在主题文件\source\css\index.styl中添加如下代码
@import '文件夹名/*.css'
Hexo-Butterfly添加磁吸效果分类
主题文档\layout\index.pug
extends includes/layout.pug

block content
  include ./includes/mixins/post-ui.pug
  #recent-posts.recent-posts
+   if theme.categoryBar.enable
+     .recent-post-item(style='height:auto;width:100%;padding:0px;margin-top:20px;')
+     #categoryBar!= list_categories(site.categories,{class: 'categoryBar',depth: 1})
    +postUI
    include includes/pagination.pug
主题文档\source\css\_layout\:
新建categoryBar.styl
if hexo-config('categoryBar.enable')
  #categoryBar
    width 100%!important
  ul
    &.categoryBar-list
      margin 5px 5px 0 5px!important
      padding 0!important

  li
    &.categoryBar-list-item
      font-weight bold
      display inline-block
      height 180px!important
      margin 5px .5% 0 .5%!important
      background-image linear-gradient(rgba(0, 0, 0, 0.4) 25%, rgba(16, 16, 16, 0) 100%)
      border-radius 10px
      padding 25px 0 25px 25px!important
      box-shadow rgba(50, 50, 50, 0.3)  50px 50px 50px 50px inset
      overflow hidden
      background-size 100%!important
      background-position center!important
      &:hover
        background-size 110%!important
        box-shadow inset 500px 50px 50px 50px rgba(50,50,50, 0.6)
        span
          &.categoryBar-list-count
            &::after
              transition all .5s
              transform translate(-100%, 0)
  a
    &.categoryBar-list-link
      color white!important
      font-size 20px!important
      &::before
        content '|'!important
        color white!important
        font-size 20px!important
      &:after
        content ''
        position relative
        width 0
        bottom 0
        display block
        height 3px
        border-radius 3px
        background-color white
      &:hover
        &:after
          width 90%
          left 1%
          transition all 0.5s

  span
    &.categoryBar-list-count
      display block!important
      color white!important
      font-size 20px!important
      &::before
        content '\f02d'!important
        padding-right 15px!important
        @extend .fontawesomeIcon
      &::after
        padding 5px
        display block!important
        color white!important
        font-size 20px!important
        position relative
        right -100%
  covers = hexo-config('categoryBar.cover')
  for cover,i in covers
    li.categoryBar-list-item:nth-child({i+1})
      background unquote(cover)
  descrs = hexo-config('categoryBar.descr')
  for descr,i in descrs
    li.categoryBar-list-item:nth-child({i+1})>span::after
      content descr!important
  if hexo-config('categoryBar.column') == 'odd'
    li
      &.categoryBar-list-item
        width 32.3%!important
  else if hexo-config('categoryBar.column') == 'even'
    li
      &.categoryBar-list-item
        width 24%!important
  @media screen and (max-width: 650px)
    li
      &.categoryBar-list-item
        width 48%!important
        height 150px!important
        margin 5px 1% 0 1%!important

  $caterow =  hexo-config('categoryBar.row')?hexo-config('categoryBar.row'):2
  .categoryBar-list
    max-height 190px * $caterow
    overflow auto
    &::-webkit-scrollbar
      width 0!important
  @media screen and (max-width: 650px)
    .categoryBar-list
      max-height 160px * $caterow
在主题配置文件中添加:
# 首页分类
categoryBar:
  enable: true
  column: odd # 显示列数,odd:3列 | even:4列
  row: 2 #显示行数,默认两行,超过行数切换为滚动显示
  descr:
    - 这里写自己标签的备注
    - 比如:
    - 这个是分类一
    - 这个是分类二
    - 这个是分类N
  cover:
    - 这里是背景
    - 可以是颜色或者图片
    - 其它形式的背景请自测
    - 下面是示例
    - '#FFFFFF'
    - url('hhttps://unpkg.zhimg.com/ahzo@latest/blogpic/8.jpg')
效果图:
Hexo-Butterfly轮播置顶样式
主题文档\layout\includes
新建sliderbar.pug
添加代码:
.blog-slider.swiper-container-fade.swiper-container-horizontal#swiper_container
  .blog-slider__wrp.swiper-wrapper(style='transition-duration: 0ms;')
    if site.data.slider
      each i in site.data.slider
        .blog-slider__item.swiper-slide(style='width: 750px; opacity: 1; transform: translate3d(0px, 0px, 0px); transition-duration: 0ms;')
          a.blog-slider__img(href=url_for(i.link)  alt='')|
            img(width='48' height='48' src=url_for(i.cover) onerror=`this.onerror=null;this.src='` + url_for(theme.error_img.post_page) + `'`, alt='')
          .blog-slider__content
            span.blog-slider__code= i.timeline
            a.blog-slider__title(href=url_for(i.link)  alt='')= i.title
            .blog-slider__text= i.description
            a.blog-slider__button(href=url_for(i.link)  alt='')= i.button
  .blog-slider__pagination.swiper-pagination-clickable.swiper-pagination-bullets
script(defer src=url_for(theme.CDN.swiper_js))
script(defer data-pjax src=url_for(theme.CDN.swiper_init))
主题文档\layout\index.pug:
extends includes/layout.pug

block content
  include ./includes/mixins/post-ui.pug
  #recent-posts.recent-posts
+   .recent-post-item(style='height:auto;width:100%;')
+     !=partial('includes/sliderbar', {}, {cache:true})
    +postUI
    include includes/pagination.pug
主题文档\source\css\_layout\
新建swiperstyle.styl,写入代码:
*
  box-sizing border-box
div#swiper_container
  background rgba(255, 255, 255, 0);
.blog-slider
  width 100%
  position relative
  border-radius 12px 8px 8px 12px
  margin auto
  background var(--global-bg)
  padding: 10px
  transition all .3s

.blog-slider__item
  display flex
  align-items center
  &.swiper-slide-active
    .blog-slider__img
      img
        opacity 1
        transition-delay .3s
    .blog-slider__content
      & > *
        opacity 1
        transform none
      & > *:nth-child(1)
        transition-delay 0.3s
      & > *:nth-child(2)
        transition-delay 0.4s
      & > *:nth-child(3)
        transition-delay 0.5s
      & > *:nth-child(4)
        transition-delay 0.6s
      & > *:nth-child(5)
        transition-delay 0.7s
      & > *:nth-child(6)
        transition-delay 0.8s
      & > *:nth-child(7)
        transition-delay 0.9s
      & > *:nth-child(8)
        transition-delay 1s
      & > *:nth-child(9)
        transition-delay 1.1s
      & > *:nth-child(10)
        transition-delay 1.2s
      & > *:nth-child(11)
        transition-delay 1.3s
      & > *:nth-child(12)
        transition-delay 1.4s
      & > *:nth-child(13)
        transition-delay 1.5s
      & > *:nth-child(14)
        transition-delay 1.6s
      & > *:nth-child(15)
        transition-delay 1.7s


.blog-slider__img
  width 200px
  flex-shrink 0
  height 200px
  padding 10px
  border-radius 5px
  transform translateX(0px)
  overflow hidden
  &:after
    content ''
    position absolute
    top 0
    left 0
    width 100%
    height 100%
    border-radius 5px
    opacity 0.8
  img
    width 100%
    height 100%
    object-fit cover
    display block
    opacity 0
    border-radius 5px
    transition all .3s

.blog-slider__content
  padding-right 50px
  padding-left 50px
  & > *
    opacity 0
    transform translateY(25px)
    transition all .4s


.blog-slider__code
  color var(--font-color)
  margin-bottom 0px
  display block
  font-weight 500

.blog-slider__title
  font-size 18px
  font-weight 700
  color var(--font-color)
  margin-bottom 15px
  -webkit-line-clamp 1
  display -webkit-box
  overflow hidden
  -webkit-box-orient vertical

.blog-slider__text
  color var(--font-color)
  -webkit-line-clamp 1
  display -webkit-box
  overflow hidden
  -webkit-box-orient vertical
  margin-bottom 15px
  line-height 1.5em
  width 100%
  display block
  word-break break-all
  word-wrap break-word

.blog-slider__button
  display inline-flex
  background-color var(--btn-bg)
  padding 4px 14px
  border-radius 8px
  color var(--btn-color)
  text-decoration none
  font-weight 500
  justify-content center
  text-align center
  letter-spacing 1px
  display none
  &:hover
    background-color var(--btn-hover-color)
    color var(--btn-color)

.blog-slider .swiper-container-horizontal > .swiper-pagination-bullets, .blog-slider .swiper-pagination-custom, .blog-slider .swiper-pagination-fraction
  bottom 10px
  left 0
  width 100%

.blog-slider__pagination
  position absolute
  z-index 21
  right 20px
  width 11px !important
  text-align center
  left auto !important
  top 50%
  bottom auto !important
  transform translateY(-50%)
  &.swiper-pagination-bullets
    .swiper-pagination-bullet
      margin 8px 0
  .swiper-pagination-bullet
    width 11px
    height 11px
    display block
    border-radius 10px
    background #858585
    opacity 0.2
    transition all .3s
  .swiper-pagination-bullet-active
    opacity 1
    background var(--btn-bg)
    height 30px

@media screen and (max-width: 600px)
  .blog-slider__pagination
    transform translateX(-50%)
    left 50% !important
    top 320px
    width 100% !important
    display flex
    justify-content center
    align-items center

  .blog-slider__pagination
    &.swiper-pagination-bullets
      .swiper-pagination-bullet
        margin 0 5px

  .blog-slider__pagination
    .swiper-pagination-bullet-active
      height 11px
      width 30px

  .blog-slider__button
    display inline-flex
    width 100%
  .blog-slider__text
    margin-bottom 40px

  .blog-slider
    min-height 350px
    height auto
    margin-top 110px
    margin-bottom 10px

  .blog-slider__content
    margin-top -80px
    text-align center
    padding 0 30px

  .blog-slider__item
    flex-direction column

  .blog-slider__img
    transform translateY(-50%)
    width 90%


  .blog-slider__content
    padding-left 10px
    padding-right 10px

  .blog-slider__pagination.swiper-pagination-clickable.swiper-pagination-bullets
    top 110px


@media screen and (min-width: 600px)
  .blog-slider
    height 200px

  .blog-slider__img
    height 200px
在主题配置文件的CDN配置中增加代码:
  # 首页轮播图
  swiper_js: https://cdn.jsdelivr.net/gh/ooahz/hexo@latest/js/swiper.min.js
  swiper_css: https://cdn.jsdelivr.net/gh/ooahz/hexo@latest/css/swiper.min.css
  swiper_init: https://cdn.jsdelivr.net/gh/ooahz/hexo@latest/js/swiper_init.js
主题文档\source\css\index.styl中添加如下代码引入:
@import url(hexo-config('CDN.swiper_css'))
最后在HEXO根目录\source\_data\
新建slider.yml,进行信息的配置:
- cover: 封面图片链接(图片与博客的相对路径或者去掉协议头的绝对路径)
  timeline: 日期,格式:'年-月-日'
  link: 置顶文章链接,站内文章建议填相对链接
  title: 置顶文章标题
  description: 置顶文章描述
  button: 手机端按钮内容
- cover: /img/xxx.jpg
  timeline: 2021-06-01
  link: /p/b2101151/
  title: hexo-butterfly轮播置顶样式
  description: Hexo-Butterfly样式的修改
  button: 详情

# ......
效果图预览:

引入第三方图标库
以阿里云图标库(Iconfont)为例;
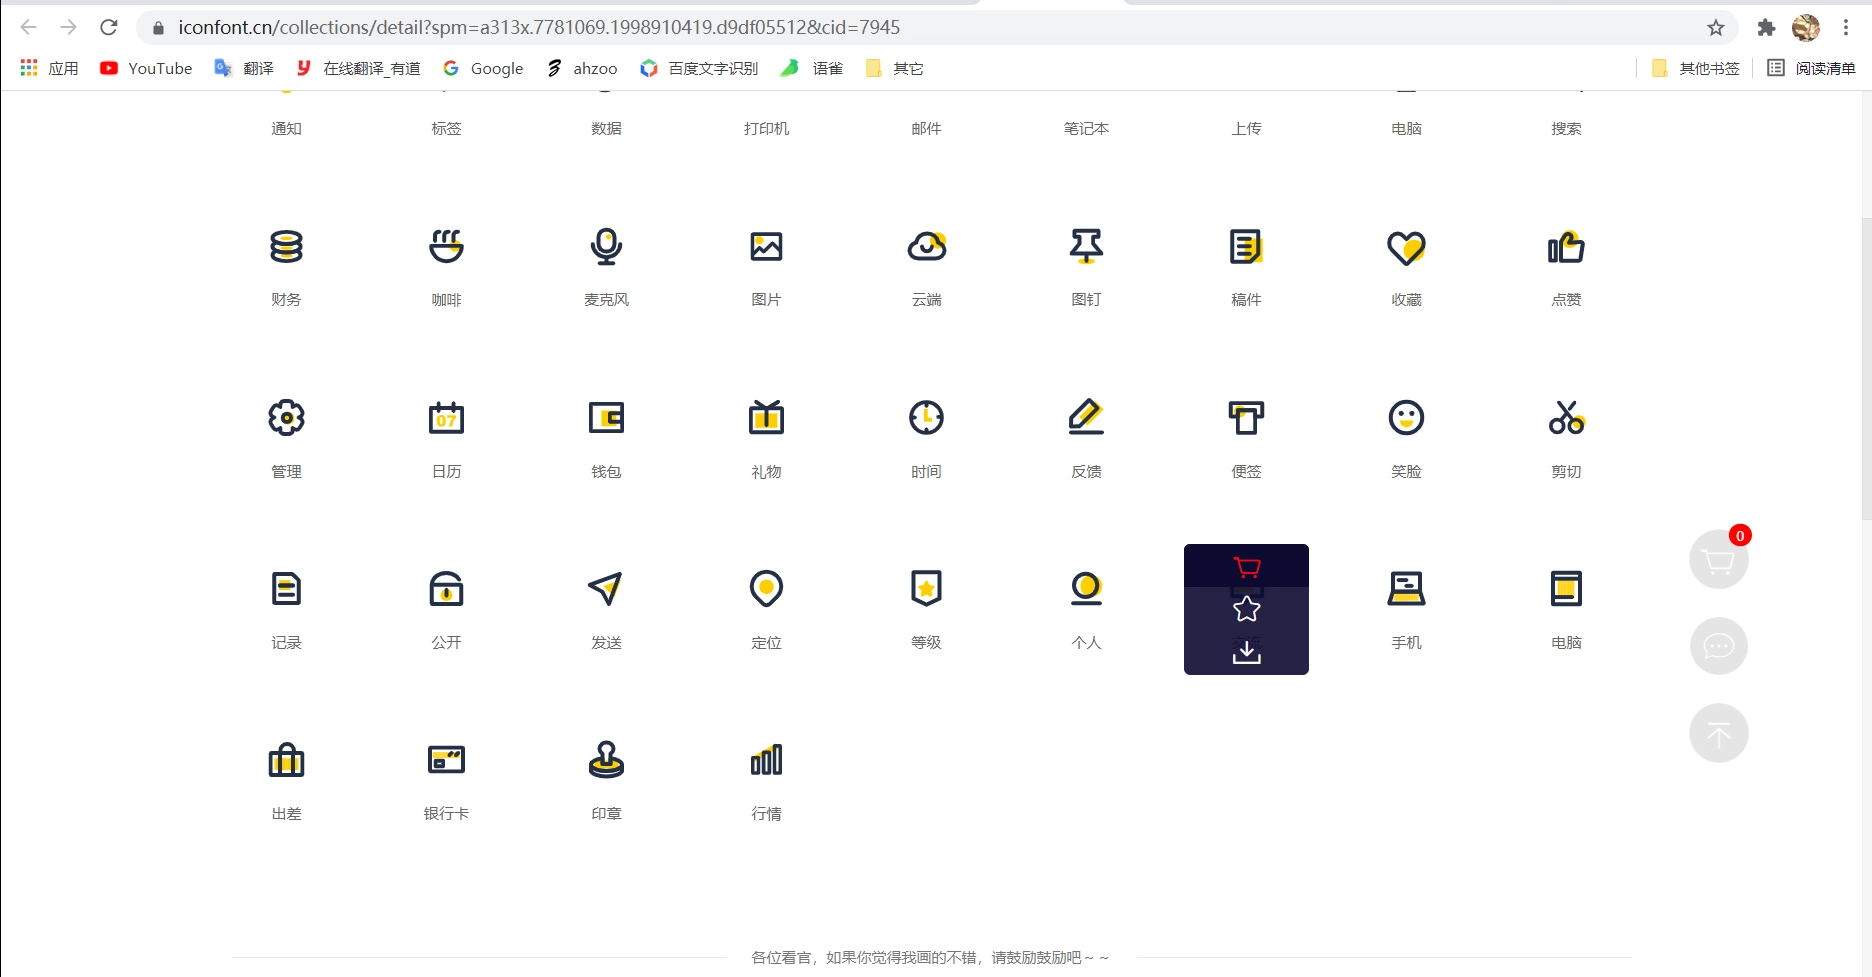
在阿里云图标库找到自己想要引入的图标,点击添加到购物车;
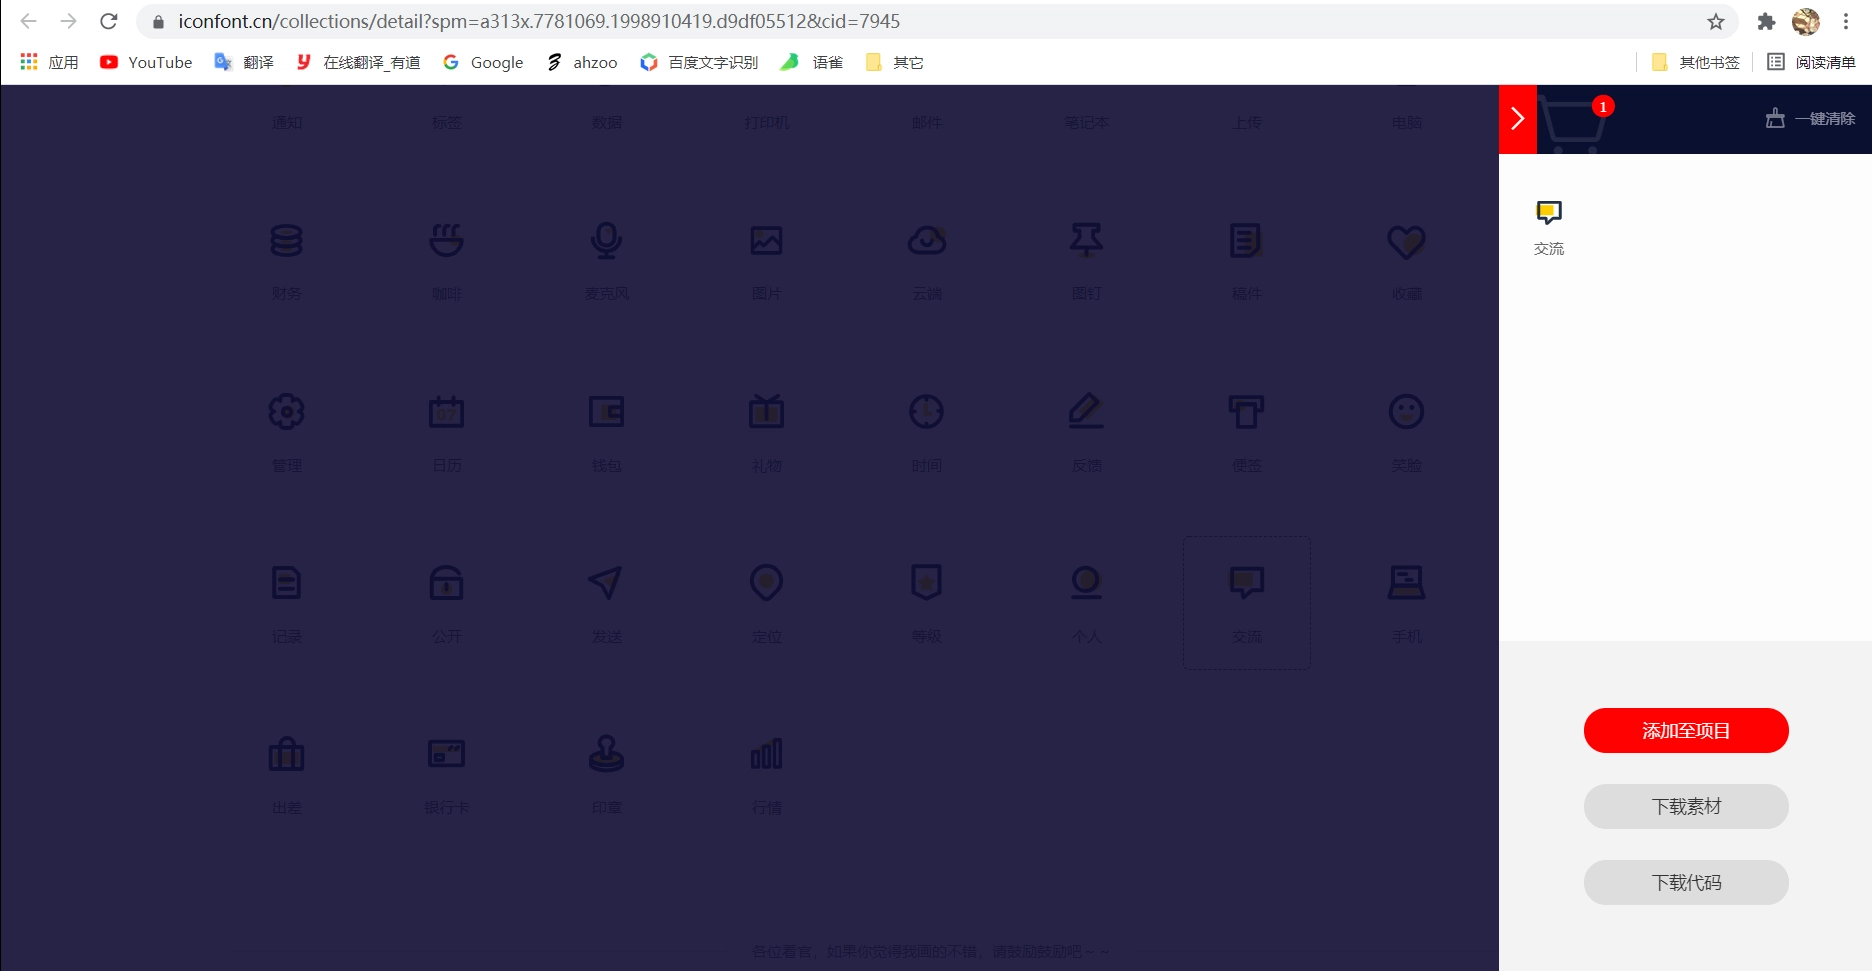
点击购物车,选中添加到项目按钮;
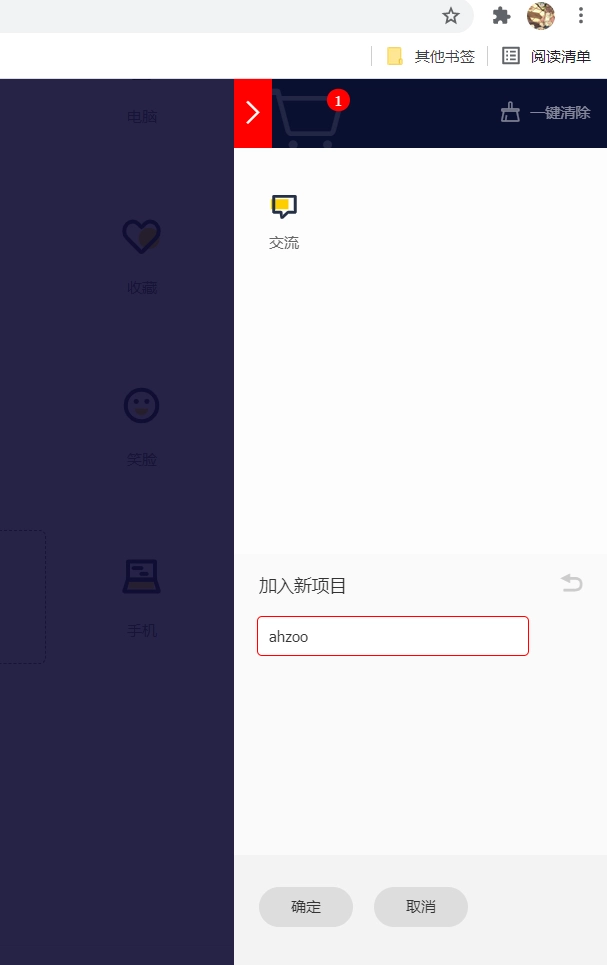
如果没有项目,就新建一个;
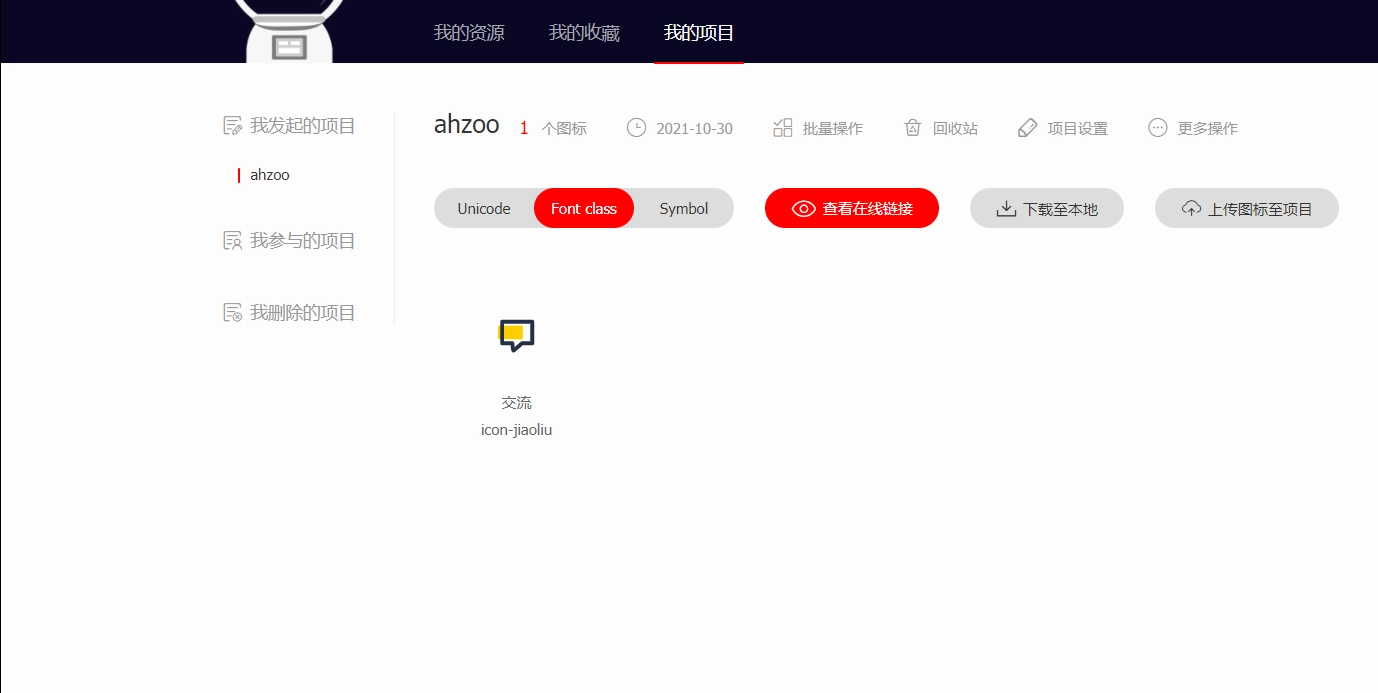
添加完成后自动跳转到项目界面;
选择添加方式(Unicode、Font class、Symbol),由于butterfly默认是Font图标,所以我们这里选择Font class(如果要引入Symbol方式的话,就需要自定义代码了),然后点击查看在线链接;
首次会提示需要生成代码(加入新的图标后,会提示更新代码),按照提示生成即可,然后复制生成的代码,在主题配置文件中引入;
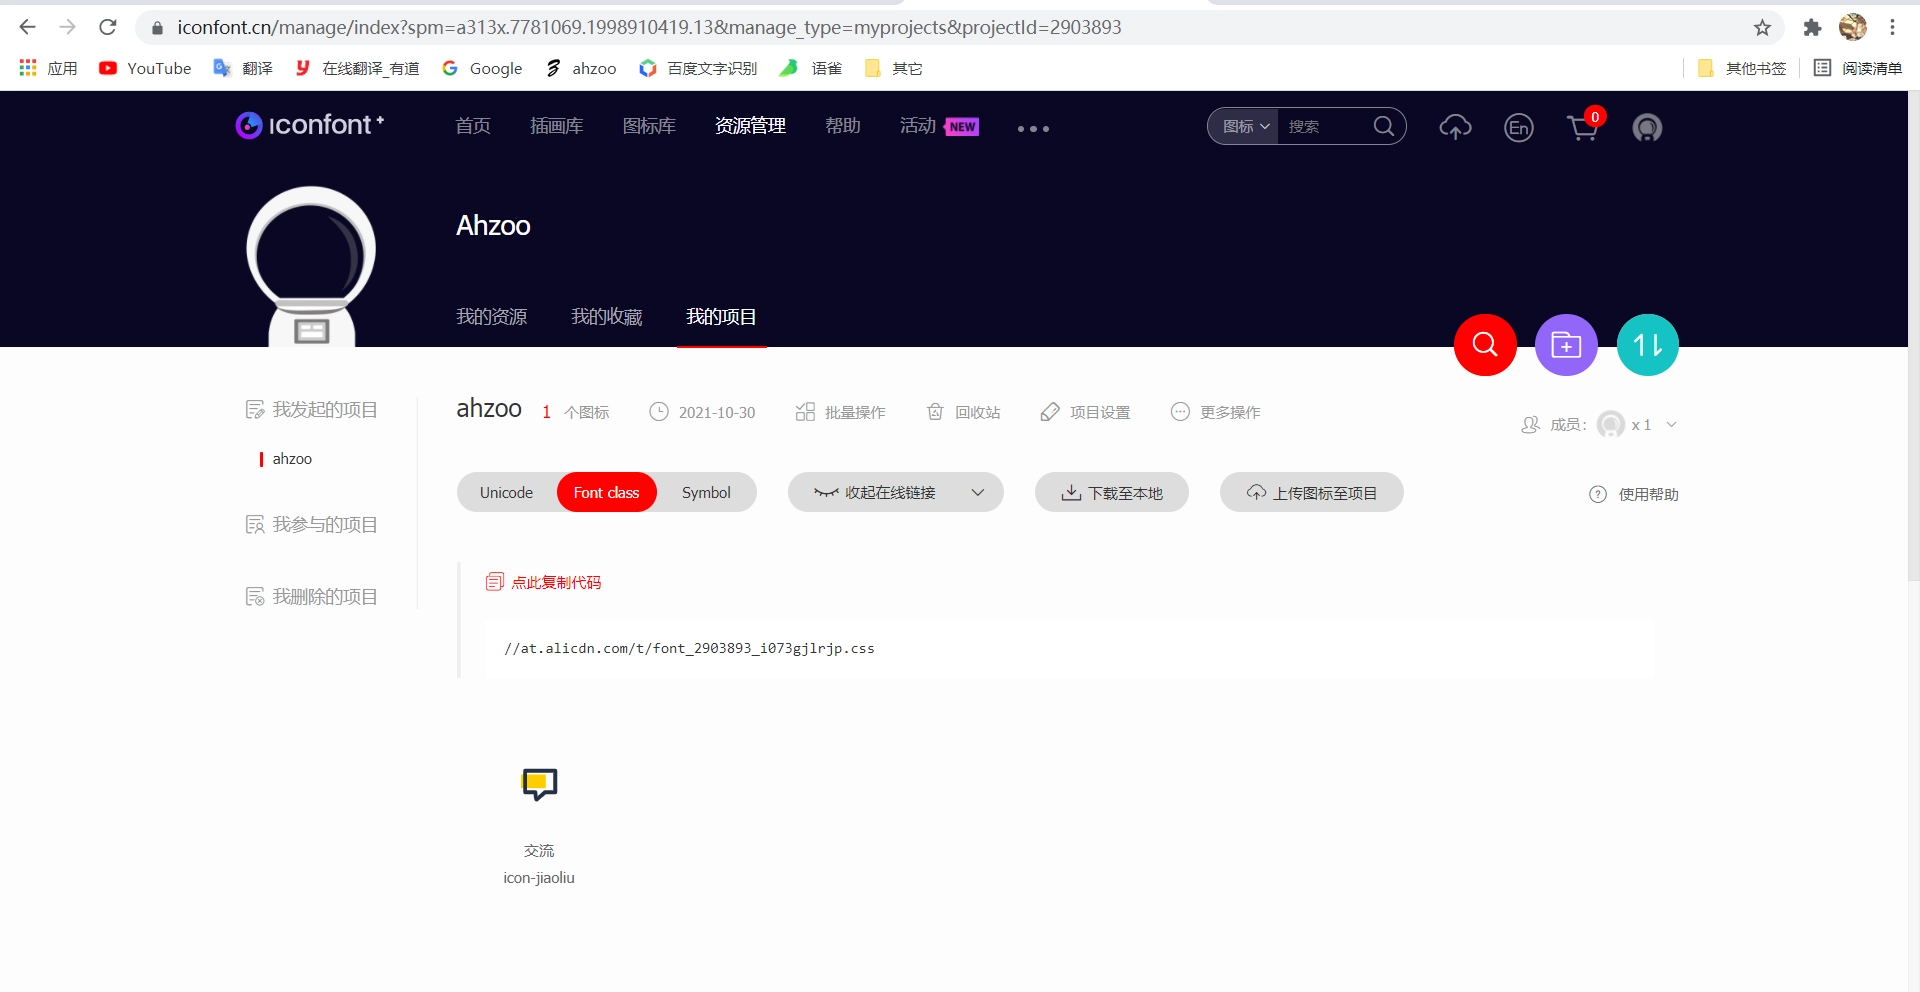
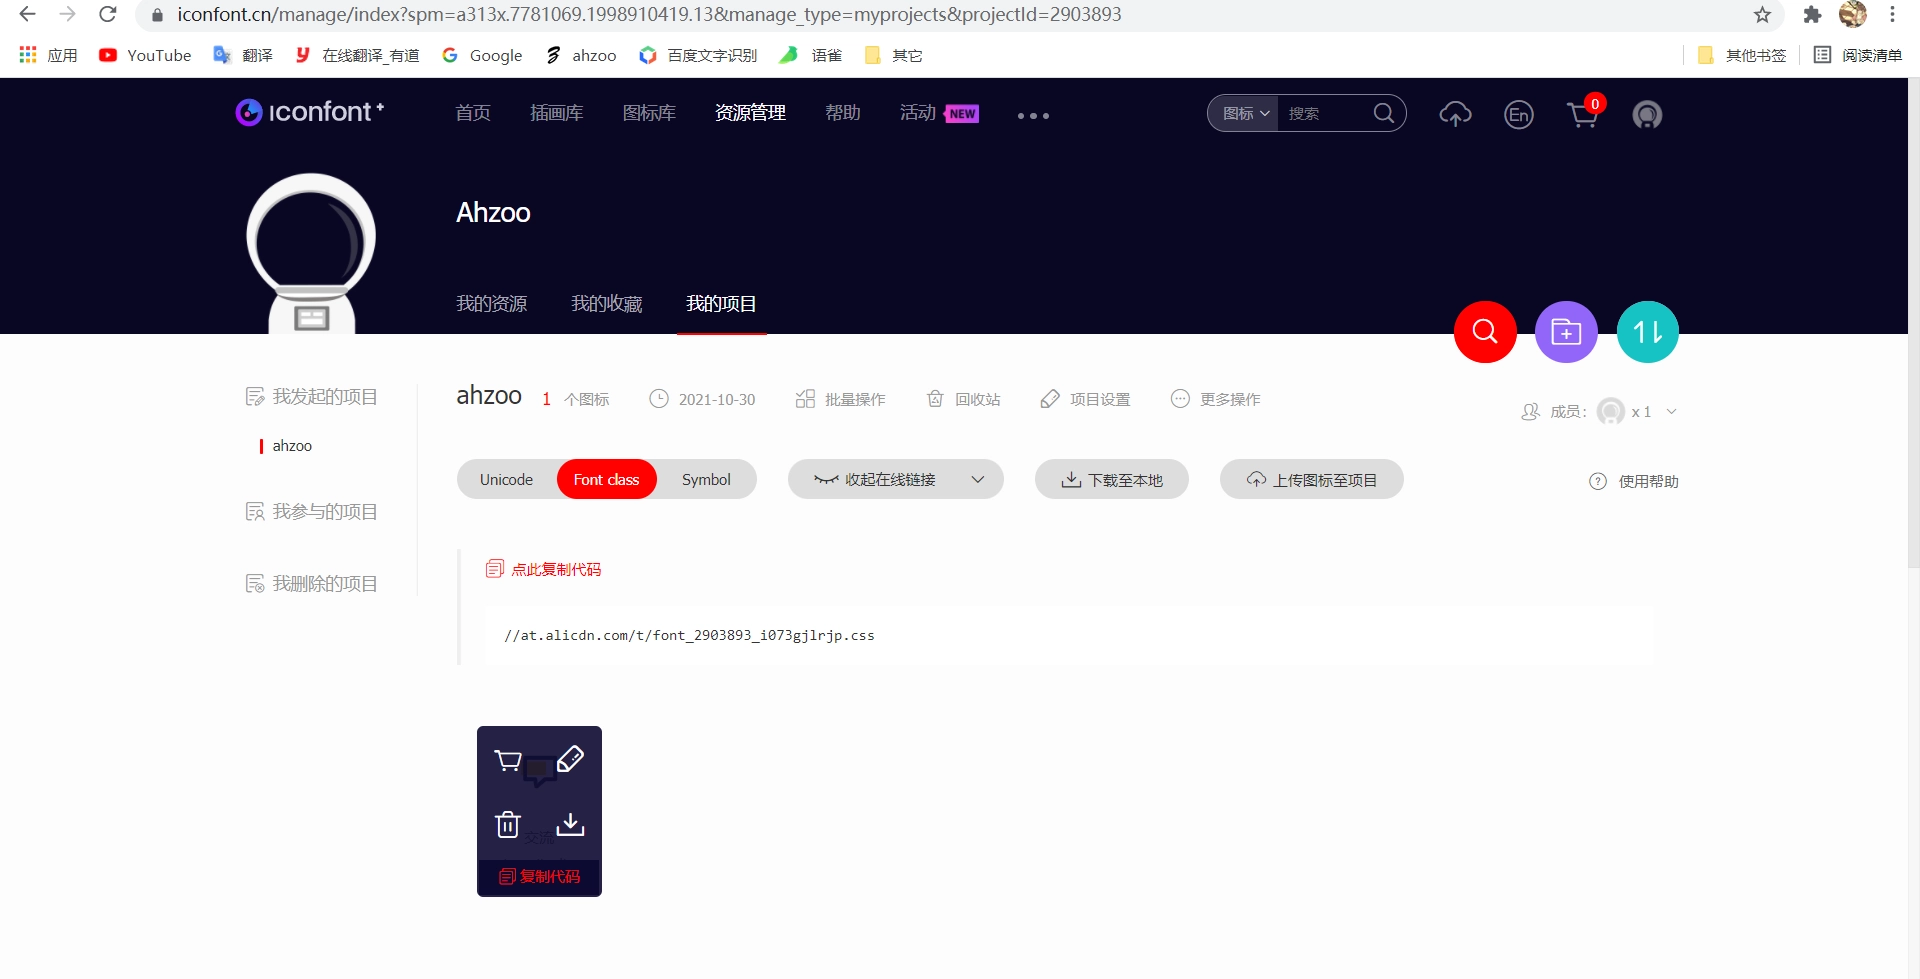
复制图标代码(icon-jiaoliu),在需要引入图标的位置填入即可;
以menu菜单为例:
menu:
  主页: / || iconfont icon-jiaoliu # 这个就是刚才复制的图标名,前面需要加上iconfont
  文章: /categories/ || iconfont icon-003-sakura
  友链: /friends/ || fas fa-link
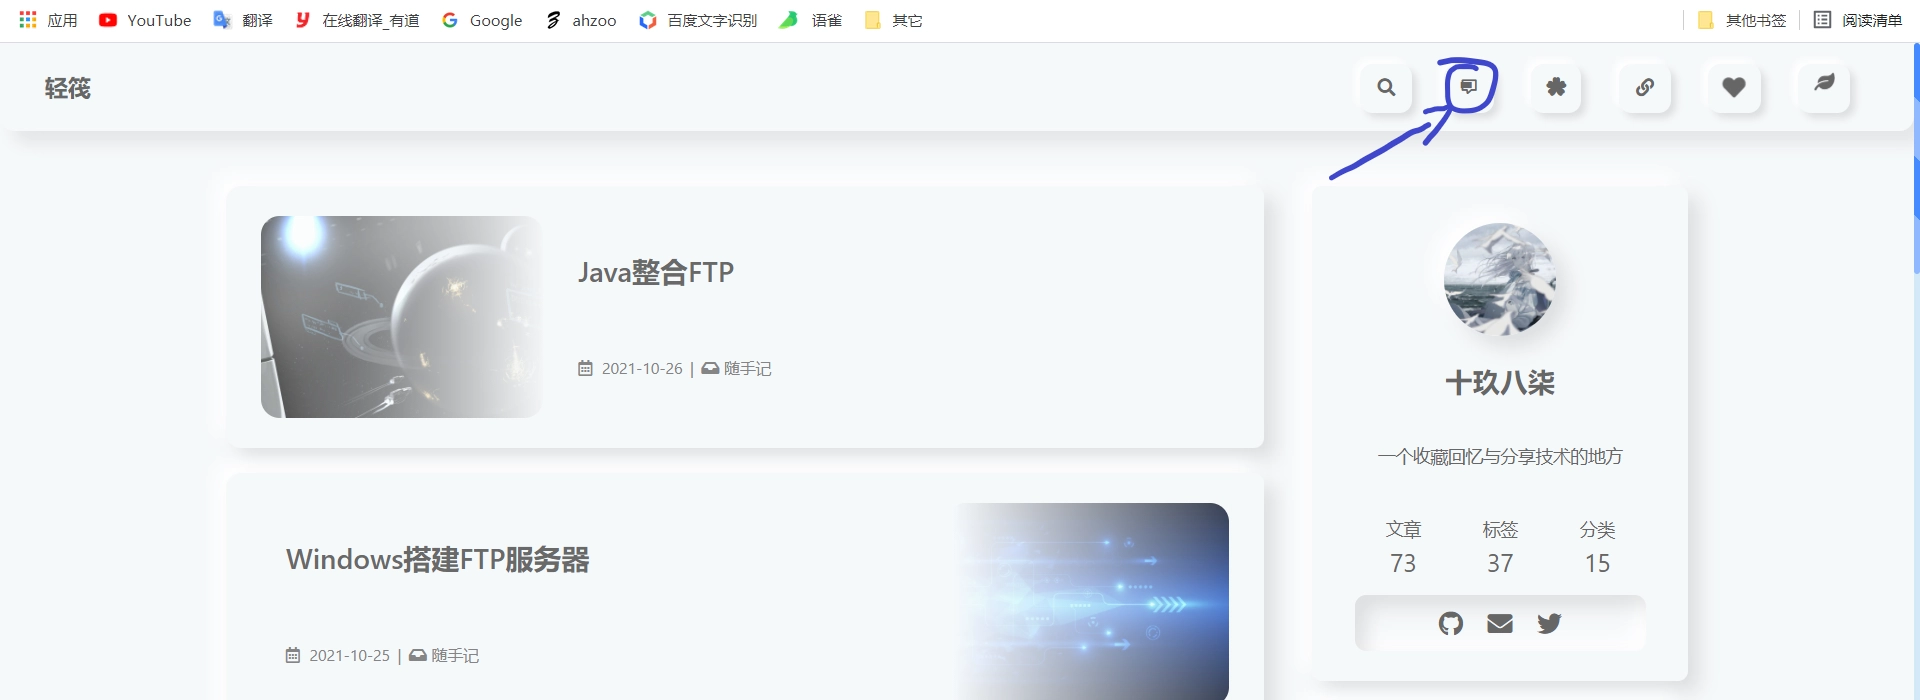
引入Symbol图标
首先引入fonticon图标库的js链接,引入方式可参考此文【引入第三方图标库】部分
菜单图标
butterfly\layout\includes\header\menu_item.pug :
  if theme.menu
    //- for mobile sidebar
    - let sidebarChildHide = theme.hide_sidebar_menu_child ? 'hide' : ''

    .menus_items
      each value, label in theme.menu
        if typeof value !== 'object'
          .menus_item
-           a.site-page(href=url_for(trim(value.split('||')[0])))
+           a.site-page.faa-parent.animated-hover(href=url_for(trim(value.split('||')[0])))
              if value.split('||')[1]
-               i.fa-fw(class=trim(value.split('||')[1]))
+               - var icon_value = trim(value.split('||')[1])
+               - var anima_value = value.split('||')[2] ? trim(value.split('||')[2]) : 'faa-tada'
+               if icon_value.substring(0,2)=="fa"
+                 i.fa-fw(class=icon_value + ' ' + anima_value)
+               else if icon_value.substring(0,4)=="icon"
+                 svg.icon(aria-hidden="true" class=anima_value)
+                   use(xlink:href=`#`+ icon_value)
              span=' '+label
        else
          .menus_item
-           a.site-page(href='javascript:void(0);')
+           a.site-page.faa-parent.animated-hover(href='javascript:void(0);')
              if label.split('||')[1]
-               i.fa-fw(class=trim(label.split('||')[1]))
+               - var icon_label = trim(label.split('||')[1])
+               - var anima_label = label.split('||')[2] ? trim(label.split('||')[2]) : 'faa-tada'
+               if icon_label.substring(0,2)=="fa"
+                 i.fa-fw(class=icon_label + ' ' + anima_label)
+               else if icon_label.substring(0,4)=="icon"
+                 svg.icon(aria-hidden="true" class=anima_label)
+                   use(xlink:href=`#`+ icon_label)
              span=' '+ trim(label.split('||')[0])
              i.fas.fa-chevron-down.expand(class=sidebarChildHide)
            ul.menus_item_child
              each val,lab in value
                li
-                 a.site-page.child(href=url_for(trim(val.split('||')[0])))
+                 a.site-page.child.faa-parent.animated-hover(href=url_for(trim(val.split('||')[0])))
                    if val.split('||')[1]
-                     i.fa-fw(class=trim(val.split('||')[1]))
+                     - var icon_val = trim(val.split('||')[1])
+                     - var anima_val = val.split('||')[2] ? trim(val.split('||')[2]) : 'faa-tada'
+                     if icon_val.substring(0,2)=="fa"
+                       i.fa-fw(class=icon_val + ' ' + anima_val)
+                     else if icon_val.substring(0,4)=="icon"
+                       svg.icon(aria-hidden="true" class=anima_val)
+                         use(xlink:href=`#`+ icon_val)
                    span=' '+ lab
使用:
menu:
  文章: /categories/ || icon-pingtai
  友链: /friends/ || icon-guanlian
预览效果见下图
侧边工具栏
butterfly\layout\includes\header\social.pug :
-each url, icon in theme.social
-  a.social-icon(href=url_for(trim(url.split('||')[0])) target="_blank"
-  title=url.split('||')[1] === undefined ? '' : trim(url.split('||')[1]))
-    i(class=icon

++each value, title in theme.social
++  a.social-icon.faa-parent.animated-hover(href=url_for(trim(value.split('||')[0])) target="_blank" title=title === undefined ? '' : trim(title))
++    if value.split('||')[1]
++      - var icon_value = trim(value.split('||')[1])
++      - var anima_value = value.split('||')[2] ? trim(value.split('||')[2]) : 'faa-tada'
++      if icon_value.substring(0,2)=="fa"
++        i.fa-fw(class=icon_value + ' ' + anima_value)
++      else if icon_value.substring(0,4)=="icon"
++        svg.icon(aria-hidden="true" class=anima_value)
++          use(xlink:href=`#`+ icon_value)
使用:
social:
  Github: https://github.com/ooahz || icon-github || faa-tada
  Twitter: https://twitter.com/Ahzoo999 || icon-twitter ||faa-float
预览效果见下图
搜索
butterfly\layout\includes\header\nav.pug :
-        a.site-page.social-icon.search
-          i.fas.fa-search.fa-fw
+        a.site-page.faa-parent.animated-hover.social-icon.search
+          - var anima_value = "faa-tada"
+          - var icon_value = "icon-sousuo"
+          svg.icon(aria-hidden="true" class=anima_value)
+            use(xlink:href=`#`+ icon_value)
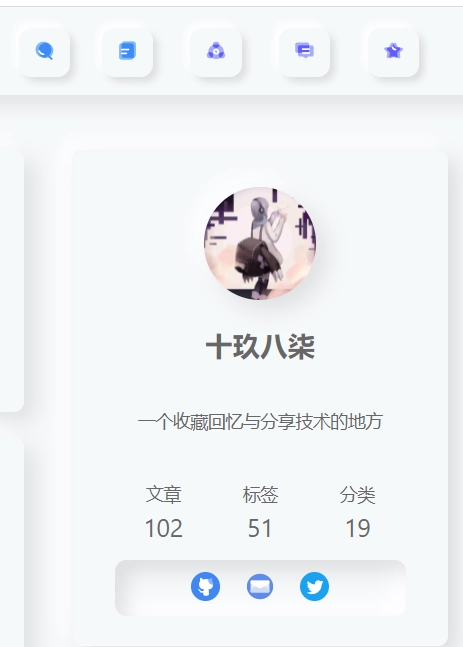
隐藏首页文章
butterfly/layout/includes/mixins/post-ui.pug
mixin postUI(posts)
  each article , index in page.posts.data
+    if article.hide !== true
+     .recent-post-item
-	 .recent-post-item
然后在Front-matter中添加字段
hide: true
缺点:虽然被隐藏的文章不会在首页显示了,但是仍会占据首页数量
文章加密
安装插件:
$ npm install --save hexo-blog-encrypt
直接对文章加密
在需要加密文章的的Front-master中添加password字段或其它扩展字段(不加扩展字段默认提示是英文)
不加拓展字段:
---
title: xxxx
date: 2021-12-02 00:00:00
password: 123456
---
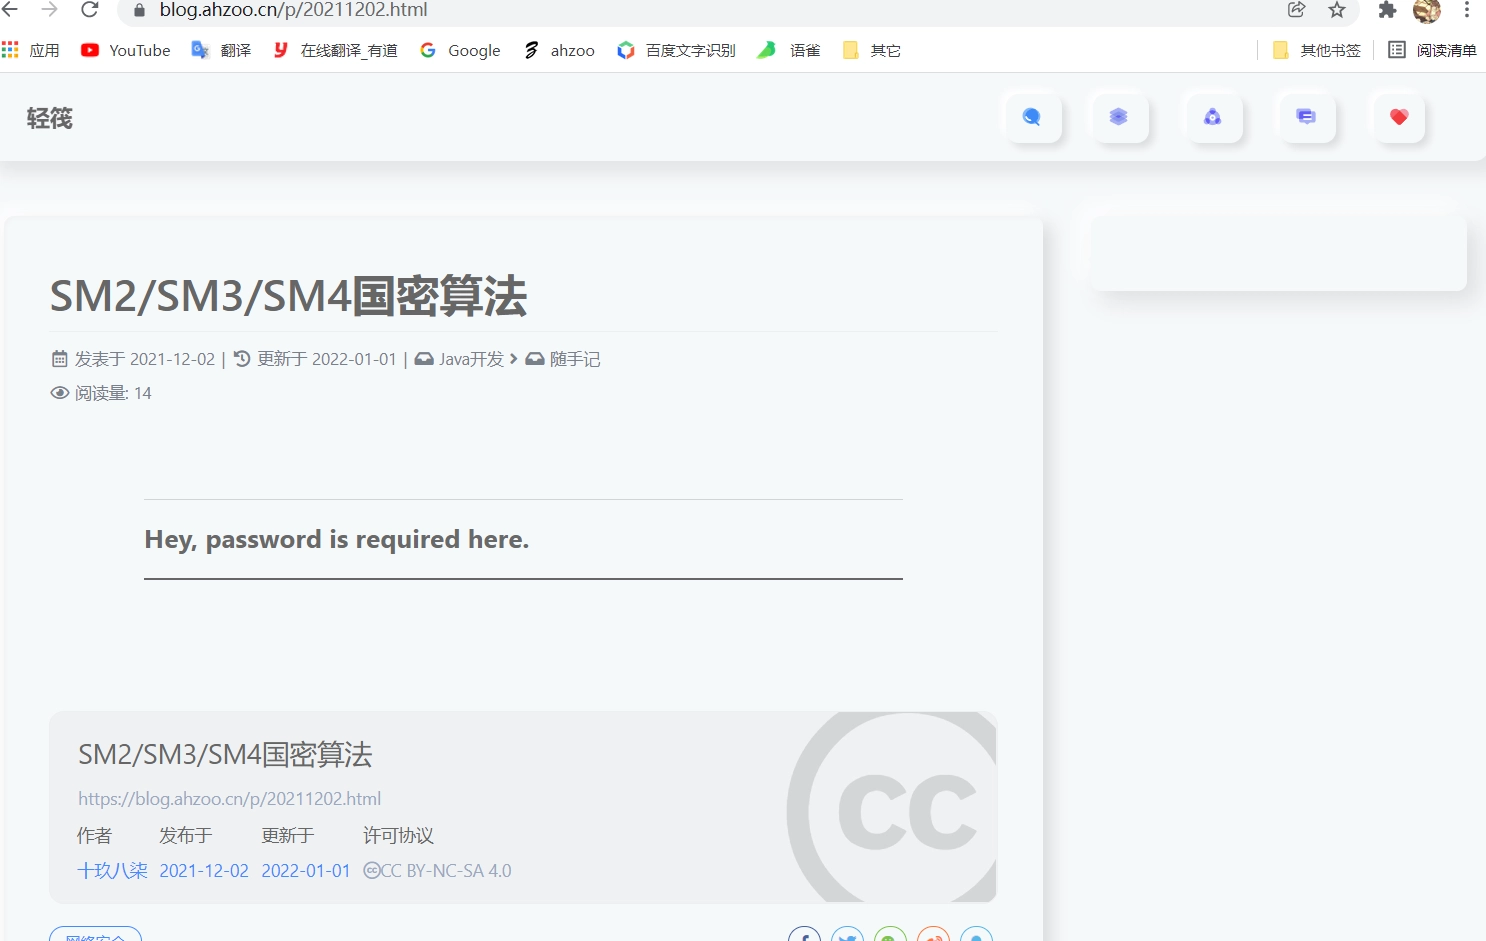
加入拓展字段:
---
title: xxxx
date: 2021-12-02 00:00:00
password: 123456
abstract: 这里有东西被加密了,需要输入密码查看哦。
message: 请在这里输入密码。
wrong_pass_message: 密码输入错误,请重试
wrong_hash_message: 抱歉,这个文章不能被校验,不过您还是能看看解密后的内容。
---
通过标签加密
直接在Hexo配置文件中添加代码:
# 文章加密
encrypt:
  abstract: 这里有东西被加密了,需要输入密码查看哦。
  message: 请在这里输入密码。
  tags:
  - {name: 标签1, password: 123456}
  - {name: 标签2, password: 654321}
# 模板样式
  template: <div id="hexo-blog-encrypt" data-wpm="{{hbeWrongPassMessage}}" data-whm="{{hbeWrongHashMessage}}"><div class="hbe-input-container"><input type="password" id="hbePass" placeholder="{{hbeMessage}}" /><label>{{hbeMessage}}</label><div class="bottom-line"></div></div><script id="hbeData" type="hbeData" data-hmacdigest="{{hbeHmacDigest}}">{{hbeEncryptedData}}</script></div>
# 提示信息(不填则默认为英文)
  wrong_pass_message: 密码输入错误,请重试
  wrong_hash_message: 抱歉, 这个文章不能被校验, 不过您还是能看看解密后的内容.


1
谢谢分享
1
这怎么实现和电脑端布局一样的
2
没太懂你什么意思,手机端和电脑端布局是不一样的啊
1
您好,我想知道您这个博客文章和侧边栏的鼠标放上去的按压阴影效果是怎么弄的
2
和网站整体的效果是一样的,具体样式可以参考我之前的一个关于实现拟态效果的文章